
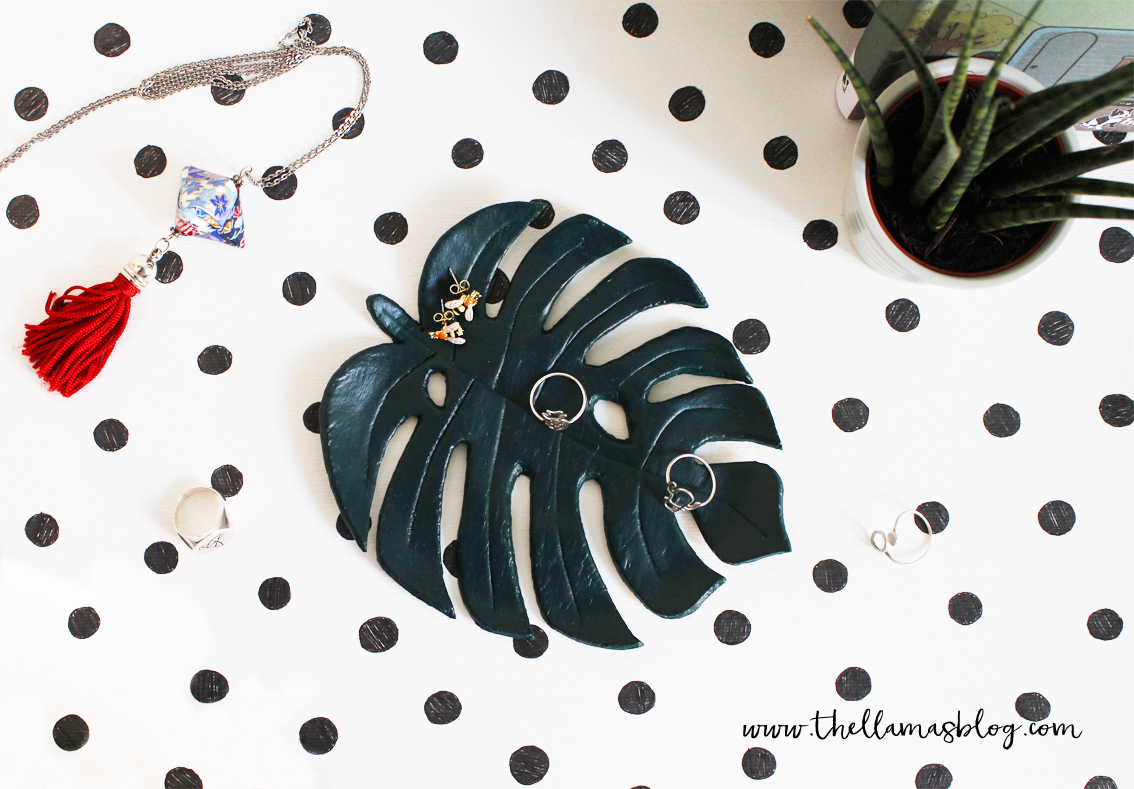
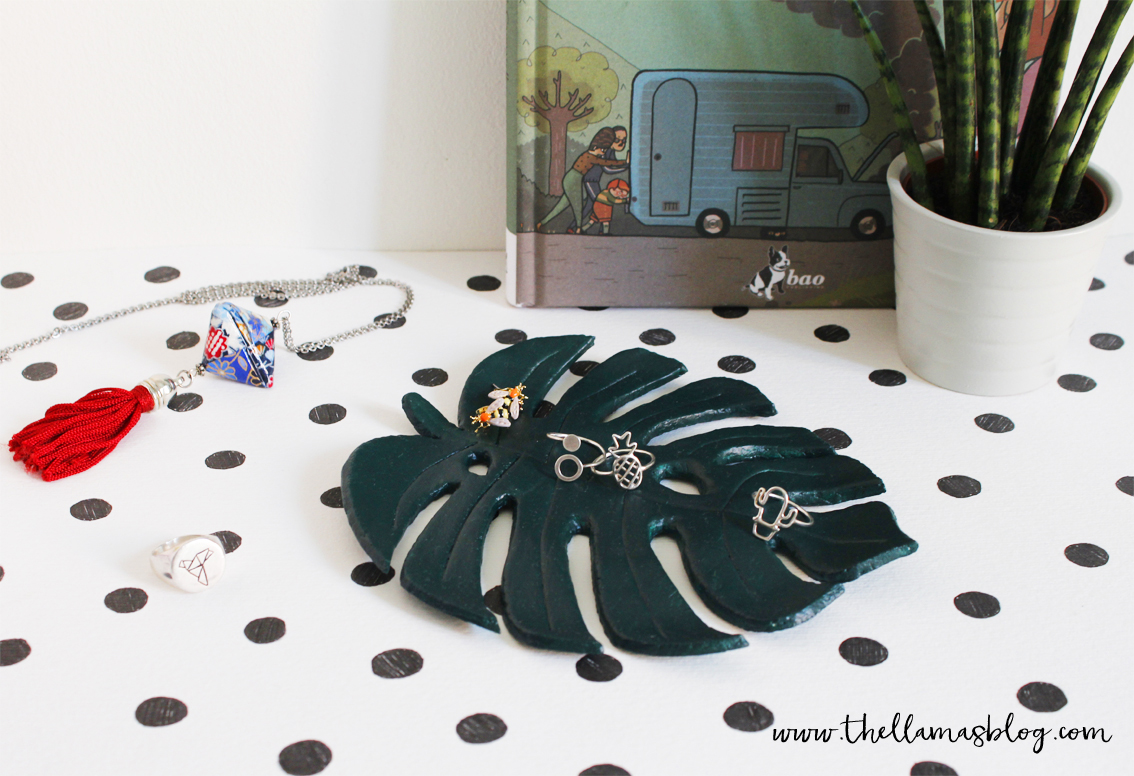
Bentornati! Il blog torna finalmente operativo dopo le vacanze estive! Vi ricordate il DIY Roundup dedicato alla Monstera Deliciosa, una delle piante da appartamento più pinnate (e instagrammate) del momento? Vi avevamo salutati con la promessa di un DIY a tema e l’abbiamo mantenuta…in questo post vi spieghiamo passo per passo come realizzare un piattino a forma di foglia di Monstera! Potete anche scaricare la sagoma della foglia, da stampare su un foglio A4. Avendo utilizzato la pasta modellabile che indurisce all’aria è davvero semplice da realizzare, non richiede cottura ed è perfetto se amate le piante ma non avete il pollice verde (come noi  ). A noi piace l’aspetto che ha la foglia quando è molto aperta, se voi la preferite più chiusa potete modificare la sagoma a vostro piacimento e in questo modo otterrete anche un piattino più capiente. Cominciamo!
Welcome back! The blog finally comes back in operation after the summer holidays! Do you remember the DIY Roundup dedicated to Monstera Deliciosa, one of the most pinned (and instagrammed) apartment plants of these time? We greeted you with the promise of a Monstera themed DIY and we kept it…in this post we are going to explain step by step how to make a Monstera leaf trinket dish! You can also download the leaf silhouette, which can be printed on an A4 sheet. Having used the air clay this dish is really easy to make, does not require cooking and is perfect if you love plants but you don’t have the green thumb (just like us ). We like the appearance of the leaf when it’s very open, if you prefer it more closed you may modify the template as you like and in this way you will also get a larger dish. Let’s begin!
For the tutorial in English click on “ENGLISH” label.
MATERIALI
- pasta modellabile auto indurente (DAS)
- colori acrilici
- sagoma della foglia (vedere qui in basso)
- pennelli
- spatola
- lima
- un piattino
- pellicola da cucina
- mattarello
- acqua
DOWNLOAD SAGOMA
- Scaricate qui la sagoma della foglia in pdf.
PROCEDIMENTO
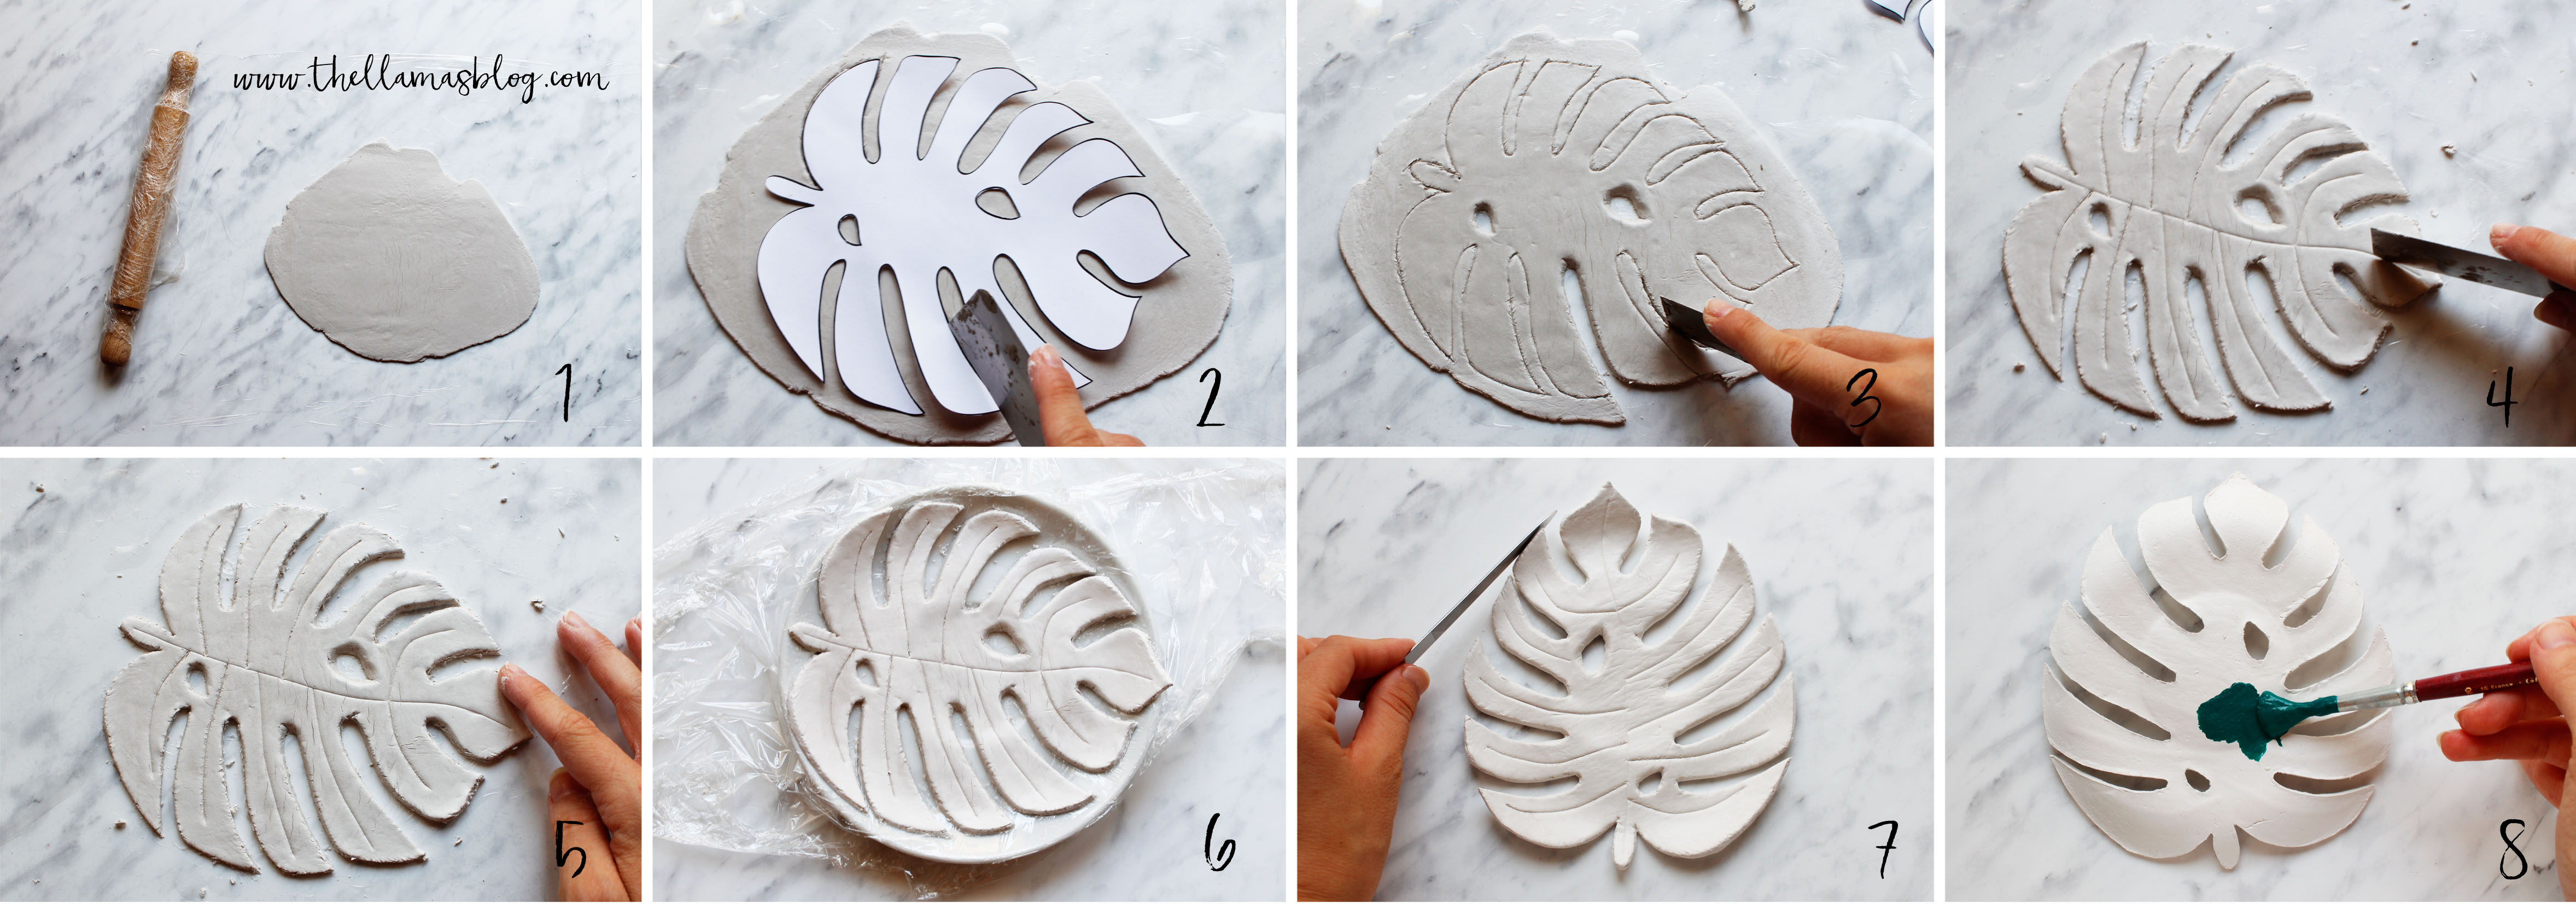
1. Copri il piano da lavoro con della pellicola da cucina e stendi la pasta modellabile aiutandoti con un mattarello (meglio se avvolto nella pellicola), fino ad ottenere un disco alto 2-3 millimetri (1) .
2. Ritaglia la sagoma della foglia, posala sul disco di pasta modellabile e traccia i contorni utilizzando la spatola (2) .
3. Sempre utilizzando la spatola elimina la pasta in eccesso. Per le parti più piccole può essere utile uno strumento dalla punta più piccola (va bene anche uno stecchino di legno) (3) .
4. Incidi le venature della foglia, premendo leggermente con la punta della spatola (4) .
5. Con le dita inumidite modella i bordi e la superficie della foglia, per renderli più lisci (5) .
6. Solleva la foglia dal piano di lavoro staccando la pellicola trasparente e adagiala su un piattino, premendola leggermente fino a farle assumere la forma concava del contenitore (6) . Lascia asciugare la pasta modellabile per il tempo indicato sulla confezione.
7. Una volta asciutta stacca la foglia dalla pellicola. Rifinisci i bordi utilizzando una lima (7) .
8. Dipingi la foglia del colore che preferisci, poi lasciala asciugare per qualche ora (8) . Se necessario dai un’altra mano di colore.
MATERIALS
- air dry clay
- acrylic colors
- leaf silhouette (see below)
- brush
- spatula
- file
- a saucer
- kitchen film
- rolling pin
- water
DOWNLOAD SILHOUETTE
- Download here the pdf leaf silhouette.
TUTORIAL
1. Cover the worktop with the kitchen film and stretch the clay by using a rolling pin (preferably wrapped in the film) until you get a disk 2-3 mm thick (1) .
2. Crop the leaf shape, place it on the clay disk and trace the contours using the spatula (2) .
3. Use the spatula to remove the exceeding clay. For smaller parts it may be useful to use a small toe tool (a wooden stick will be ok) (3) .
4. Trace the leaf veinings by slightly pressing the tip of the spatula (4) .
5. Moisten your fingers and mold the edges and the surface of the leaf, to make it smoother (5) .
6. Raise the leaf from the worktop by removing the transparent film and lay it on a saucer, pressing it lightly until it takes the concave form of the container (6) . Leave the clay dry for the time indicated on the package.
7. Once dry, remove the leaf from the film. Finish the edges using a file (7) .
8. Paint the leaf with your favorite color, then let it dry for a few hours (8) . If necessary, give another coat of color.
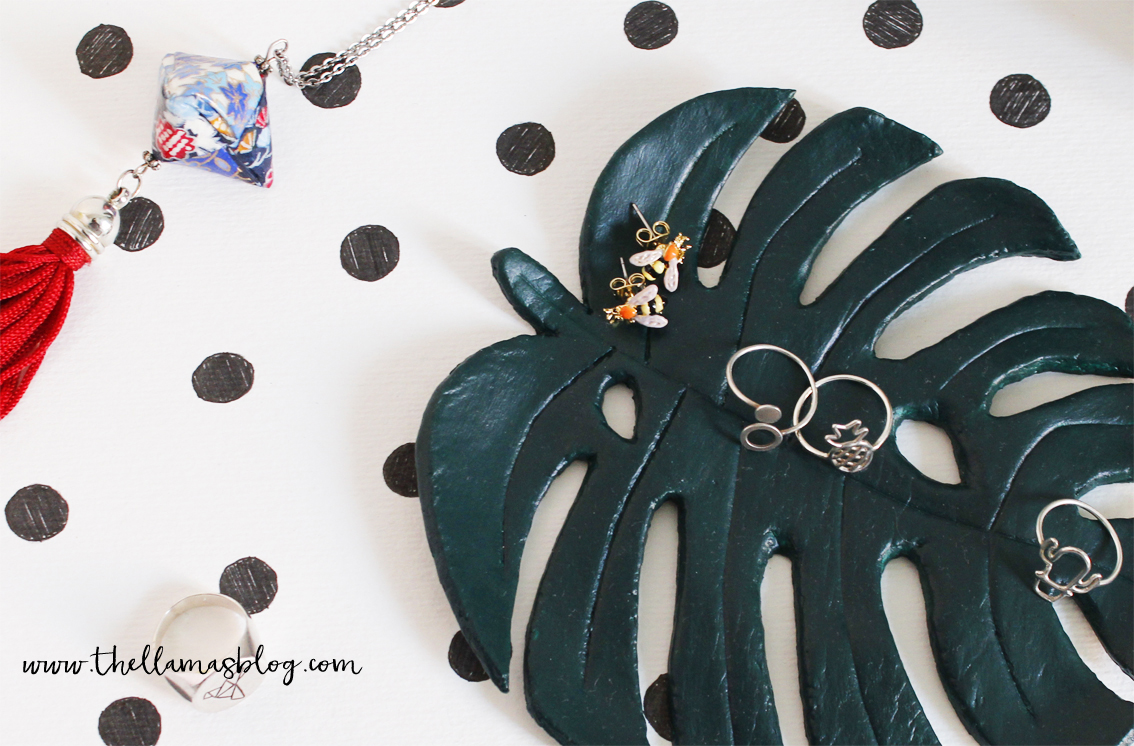
Mi piacerebbe davvero avere in casa un esemplare di Monstera, ma è una pianta che raggiunge notevoli dimensioni e il nostro appartamento è davvero piccolo…per fortuna c’è Laura che riesce sempre a riportarmi alla ragione! Speriamo che questo DIY vi sia piaciuto, è stato un po’ un esperimento e non eravamo sicure avrebbe funzionato (l’ansia che non stesse in piedi era sempre in agguato), ma dobbiamo ammettere che siamo piuttosto soddisfatte del risultato. Ci siamo mantenute sul classico e l’abbiamo dipinto di verde, ma sarebbe fantastico anche di un bel colore vivace e brillante. Insomma, personalizzatelo e mostrateci il risultato usando l’hashtag #thellamascrew!
I really would like to have one Monstera at home, but it’s a plant that reaches a considerable size and our apartment is really small…fortunately there is Laura, she is always able to bring me to my senses! We hope that you appreciated this DIY, it was a bit of an experiment and we were not sure it would have worked, but we have to admit that we are quite satisfied with the result. We kept on the classic and painted it green, but it would be great even with a beautiful bright and brilliant color. Personalize your leaf and show us the result with the hashtag #thellamascrew!